As an Amazon Associate, Akermin earns from qualifying purchases. Product links on this page are affiliate links.
Switch the detector on in clean air and let it warm up and zero for the stated time. Inspect the probe tip filter; replace it if oily or discolored. Hold the probe to a reference leak (typically 3 g/yr) for a few seconds: the detector should indicate within about two seconds and recover within a few seconds of removal. If no reference leak is available, a momentary whiff from a refrigerant cylinder or a loosened Schrader cap confirms response, not sensitivity. A weak, slow or absent response means a worn sensor, a blocked filter or contamination; replace the sensor before relying on the detector.
Why test
Heated-diode sensors wear with every hour and every hit; infrared cells foul; tip filters clog with oil. None of these produce an error message. A detector that missed a 3 g/yr leak this morning shows the same clean-air reading as one that would have found it. See sensor lifespan and why gas detectors need bump tests.
Procedure
- Clean air. Test outdoors or in a room with no refrigerant, solvent or sanitizer in use.
- Warm up. Switch on; wait the full warm-up (heated diode 30 to 90 seconds; infrared shorter).
- Zero. Let the auto-zero settle or press zero.
- Inspect the tip. Remove the filter; if oily, wet or discolored, replace it. Check the probe for kinks.
- Reference leak. Hold the probe tip at the reference leak’s port, in still air, for 3 to 5 seconds. Note the time to indicate.
- Recovery. Move the probe away; the indication should drop back within a few seconds.
- Sensitivity levels. Repeat on low sensitivity if the detector has settings; it should still respond to the reference leak on the setting you will search with.
- Record the check for jobs where records are required.
Without a reference leak
- Loosen a Schrader cap on a charged system slightly and hold the probe near it; retighten.
- Crack a refrigerant cylinder valve for an instant near the probe (outdoors; releasing refrigerant is regulated, keep it to a whiff).
- Hold the probe near a can of compressed duster containing HFC (check the propellant).
These confirm the sensor is alive. They do not confirm it meets 3 g/yr, and a heated-diode sensor past its life can respond to a whiff and miss a small leak. Buy a reference leak if you rely on the detector.
Interpreting
| Result | Meaning | Action |
|---|---|---|
| Indicates within 2 s, recovers in seconds | Healthy | Use |
| Indicates slowly, weak signal | Sensor aging or filter partly blocked | Replace filter; if unchanged, replace sensor |
| No response | Dead sensor, blocked probe, or still warming | Re-warm; check probe; replace sensor |
| Constant indication in clean air | Contaminated sensor or air; failed zero | Move to cleaner air; replace filter; re-zero |
| Very slow recovery | Saturated sensor | Leave in clean air; avoid direct cylinder blasts |
Keeping it working
- Cap the probe when not in use; keep the tip out of oil and water.
- Track sensor hours or age; heated-diode sensors are consumables.
- Store at room temperature; charge the battery.
- Do not blast the probe with refrigerant to “test” it; it shortens sensor life.
Sensor technology differences are in infrared vs heated-diode detectors; selection in how to choose a refrigerant leak detector.
Recommended Tools


Products shown because their documented specifications fit this guide. Price and availability are on Amazon and can change.
Frequently Asked Questions
What is a reference leak?
A small sealed source that emits refrigerant at a known rate, typically 3 g/yr, supplied with professional detectors or sold separately. Holding the probe to it confirms the detector meets its sensitivity claim.
Can I test with a refrigerant cylinder?
Yes, roughly. Crack the valve for an instant near the probe or hold the probe near a loosened Schrader cap. It confirms response but not sensitivity; a reference leak is the proper check.
How often should I test the detector?
Before each job or each day of use, and after any event that may have contaminated the sensor (oil on the tip, a large refrigerant hit).
Affiliate disclosure: Akermin earns a commission from qualifying Amazon purchases made through links on this page. Our editorial picks are based on documented specifications and owner feedback, not commissions.
Related Guides

WiFi Natural Gas Alarm Review: One Unit Reveals the Whole Design
A WiFi natural gas alarm with an LCD showing gas concentration status and temperature, a stated response within 30 seconds, an alarm of at least 85 decibels and notifications to a phone app.
Read More→
Forensics Detectors Cl2 Review: 5 Percent of Full Scale Is 2.5 ppm
A rechargeable chlorine detector with an electrochemical sensor reading 0 to 50 ppm at 0.1 ppm resolution, a response time under 30 seconds, adjustable audible, visual and vibrating alarms and a supplied calibration certificate.
Read More→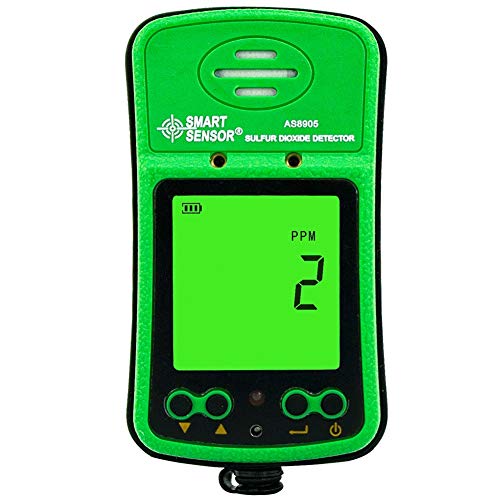
Smart Sensor SO2 Detector Review: 0.1 ppm Steps, No Accuracy Figure
A clip on sulfur dioxide monitor built on an electrochemical sensor, reading 0 to 20 ppm in 0.1 ppm steps, with adjustable high and low alarms signalled by sound, flash and vibration and a rechargeable cell quoted at 8 to 9 hours.
Read More→