As an Amazon Associate, Akermin earns from qualifying purchases. Product links on this page are affiliate links.
For electrical work choose a camera with a temperature range to at least 400 °C, accuracy of ±2 °C or ±2 percent, enough native resolution to resolve a 10 mm terminal from the arc-flash boundary (256×192 or 320×240 for most panels; 160×120 with a narrow lens at close range), adjustable emissivity and reflected temperature, a spot or delta-T tool for comparing phases, and a laser pointer for locating the hot spot. Then apply the discipline: identical components under identical load should look alike, bare metal reads low, and the panel is opened by a qualified person under a safe procedure.
Step 1: Range and accuracy
A loose connection at rated load can sit at 100 to 200 °C; a failing one higher. Cameras with a 150 °C top range saturate exactly where the interesting readings are. Look for 400 °C or more and a stated accuracy of ±2 °C or ±2 percent, which lets you rank faults by severity: a 10 °C rise over a similar component is worth watching; 35 °C or more is a repair-now finding under common guidelines.
Step 2: Resolution and spot size
The camera must be far enough away to be outside the arc-flash boundary and close enough that the terminal covers several pixels. Spot-size ratio (distance to spot, from the lens and detector) tells you the largest distance for a given target: a camera that resolves a 10 mm target at 1 m needs 320×240 or a narrow lens to do it at 3 m. See how to compare thermal camera resolution.
Step 3: Emissivity tools
Panels are full of bare copper, aluminum and galvanized steel, all low-emissivity. The camera needs adjustable emissivity and reflected temperature, and the operator needs the habit of comparing similar components rather than reading absolute numbers off bare metal. See how to set emissivity and why shiny metal misleads a thermal camera.
Step 4: Features that speed the work
- Delta-T or two-spot measurement: reads the difference between two points directly; the core of phase-to-phase comparison.
- High-temperature alarm and isotherm: highlights anything above a threshold across the frame.
- Laser pointer: shows colleagues which terminal.
- Visible overlay: identifies breakers and labels in the report.
- Manual focus: important for small targets at distance.
- Lens options: a telephoto lens for switchgear from a distance.
- Load reading: not a camera feature, but the thermal finding means nothing without the current; carry a clamp meter. See multimeter vs clamp meter.
Camera classes
| Class | Examples | Suits |
|---|---|---|
| Spot thermal camera | FLIR TG268, TG165-X | Electricians needing a number plus a low-resolution picture to find it |
| Compact 160×120 to 320×240 | FLIR C5, C8, E5 Pro; TOPDON TS001 | Residential and light commercial panels at close range |
| Professional 320×240 to 640×480 with lenses | FLIR E-series and T-series, testo 872s, HIKMICRO M-series | Switchgear, MCCs and substations from a distance; routine surveys |
Safety and method
- Inspection is done under load, ideally at 40 percent or more of rated, or faults do not show.
- Panels are opened only by qualified persons with the PPE for the arc-flash category; the thermographer stays outside the boundary.
- Compare identical components carrying similar current; note the current with a clamp meter.
- Read insulation, cable jackets and tape patches for absolute temperatures; bare metal only comparatively.
- Record delta-T against similar components and against ambient; apply the client’s or standard’s severity criteria.
- Document with thermal and visible images, load and ambient. See what makes a good thermal image.
Cameras suited to building work overlap with entry-level electrical use; see best thermal cameras for home inspection and the general selection in choosing a thermal camera for home inspection.
Recommended Tools


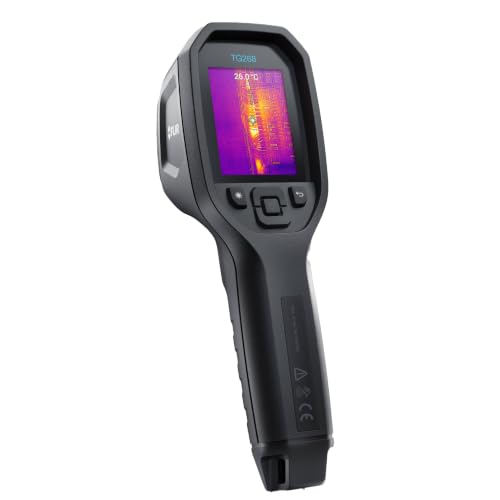

Products shown because their documented specifications fit this guide. Price and availability are on Amazon and can change.
Frequently Asked Questions
What temperature range do I need for electrical inspection?
At least −20 to 400 °C. Failing connections can exceed 150 °C and motor and transformer surfaces more; a 150 °C ceiling saturates on the faults you most want to see.
Why do shiny bus bars read cold?
Low emissivity. Bare copper and aluminum emit little infrared and reflect the room. Compare like with like, read the insulation or a tape patch, and set emissivity where possible.
Can I inspect a live panel with a thermal camera?
Only with the panel opened by a qualified person under a safe procedure with the appropriate PPE for the arc-flash category. The camera lets you keep distance; it does not make the panel safe.
Affiliate disclosure: Akermin earns a commission from qualifying Amazon purchases made through links on this page. Our editorial picks are based on documented specifications and owner feedback, not commissions.
Related Guides

PHOEBUS LINK RCX100 Review: 40 mK Is the Figure This Job Needs
A handheld thermal camera with a 160 by 120 infrared detector, a 320 by 240 enhanced image, 40 mK sensitivity, a focus free 40 by 30 degree field of view, a 25 Hz refresh rate and still JPG image capture.
Read More→
Fluke 62 MAX+ Review: The Cold End Is Printed Three Different Ways
A non contact infrared thermometer for electrical, mechanical, HVAC and automotive surfaces, with dual rotating lasers that mark the edges of the measurement area, minimum, maximum, difference and average readings, and an IP54 rating.
Read More→
General Tools MMD7NP Review: Percent on Wood, Relative on Drywall
A pinless non invasive moisture meter that reads up to three quarters of an inch into a surface, with scales of 0 to 53 percent for softwood, 0 to 35 percent for hardwood and relative readings on wallboard, drywall and masonry.
Read More→